Mastering the Essentials: A Step-by-Step Tutorial to Changing a Flat Tire
Getting a flat tire is an inconvenience that every driver is bound to face at some point. While it might seem daunting at first, changing a flat tire is a skill that every driver should possess. In this comprehensive guide, we’ll walk you through the step-by-step process of changing a flat tire, ensuring you’re back on the road safely and with confidence.
Before You Begin
Before you find yourself in a situation where you need to change a flat tire, it’s essential to be prepared. Here’s what you should have in your car at all times:
- Spare Tire: Make sure you have a properly inflated spare tire in your vehicle. Check it regularly to ensure it’s in good condition.
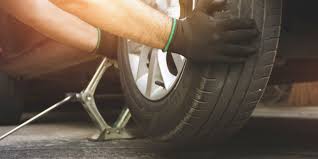
- Jack: A car jack is crucial for lifting your vehicle off the ground. Ensure it’s in good working condition and the appropriate type for your vehicle.
- Lug Wrench: This tool is used to loosen and tighten the lug nuts holding the tire in place. It usually comes with the car’s toolkit.
- Wheel Wedges: These prevent your vehicle from rolling while it’s jacked up. You can use bricks, large rocks, or commercial wheel wedges.
- Gloves and Safety Gear: Keeping your hands clean and protected is important. Additionally, having reflective vests and hazard triangles can enhance your visibility to other drivers.
- Flashlight: A flashlight will be useful if you’re changing a tire in low light conditions.
- Owner’s Manual: Your vehicle’s owner’s manual will provide specific instructions and guidelines related to changing a tire for your make and model.
Step-by-Step Guide
1. Find a Safe Location
As soon as you realize you have a flat tire, find a safe spot to pull over. Choose a level, stable surface away from traffic. If you’re on the highway, exit if possible, and move to the shoulder.
2. Turn on Hazard Lights
Activate your hazard lights to alert other drivers that you’re experiencing a problem.
3. Apply Wheel Wedges
Place wheel wedges in front of and behind the tire diagonally opposite to the flat one. This prevents your vehicle from rolling while you’re changing the tire.
4. Remove Wheel Cover (If Applicable)
If your vehicle has a hubcap or wheel cover, use the flat end of the lug wrench to gently pry it off. Be careful not to damage it.
5. Loosen Lug Nuts
Using the lug wrench, start loosening the lug nuts on the flat tire, but don’t remove them completely at this point. Loosen them by turning the wrench counterclockwise. This might require some effort, as lug nuts can be quite tight.
6. Position the Jack
Consult your owner’s manual to identify the proper jacking points for your vehicle. Place the jack under the frame of the vehicle, near the flat tire’s location. Ensure the jack is stable and securely positioned.
7. Lift the Vehicle
Using the jack, slowly lift the vehicle off the ground. Stop raising the vehicle once there’s enough clearance to remove the flat tire and replace it with the spare.
8. Remove the Lug Nuts and Flat Tire
Fully remove the lug nuts and set them aside in a safe place. Gently pull the flat tire towards you to remove it from the wheelbase.
9. Install the Spare Tire
Lift the spare tire onto the wheelbase and align the lug nut posts with the holes in the spare tire. Push the spare tire onto the wheelbase until it’s fully seated.
10. Hand-Tighten Lug Nuts
Thread the lug nuts onto the posts by hand, turning them clockwise as far as you can. This ensures the spare tire is correctly positioned.
11. Lower the Vehicle
Using the jack, carefully lower the vehicle back to the ground.
12. Tighten Lug Nuts
With the vehicle on the ground, use the lug wrench to tighten the lug nuts as much as possible in a crisscross pattern. This ensures even pressure on the tire. Don’t fully tighten them just yet.
13. Lower the Vehicle Completely
Lower the vehicle all the way to the ground using the jack and remove it.
14. Fully Tighten Lug Nuts
With the vehicle on the ground, go over each lug nut again, using the lug wrench to fully tighten them in the crisscross pattern. This step is crucial for ensuring the wheel is properly secured.
15. Replace Wheel Cover
If your vehicle has a hubcap or wheel cover, gently tap it back into place using the palm of your hand.
16. Store Equipment and Inspect
Place the flat tire, jack, lug wrench, and any other tools back in your vehicle. Inspect the spare tire to ensure it’s properly inflated and in good condition.
17. Check Tire Pressure
After driving a short distance, check the pressure of the spare tire using a tire pressure gauge. Adjust the pressure if necessary.
18. Repair or Replace the Flat Tire
Depending on the extent of the damage, you might need to repair or replace the flat tire. Consult a professional tire shop for expert advice.
Conclusion
Changing a flat tire might seem intimidating, but with the right tools and knowledge, it’s a manageable task that every driver should be prepared to handle. By following this comprehensive guide, you’ll be able to change a flat tire safely and effectively, allowing you to get back on the road with confidence. Remember, practice makes perfect, so consider practicing changing a tire in a controlled environment before you find yourself in a real-life situation.